Creating an Alert
Setting up an alert is a two-step process that gives you complete control over your notifications.
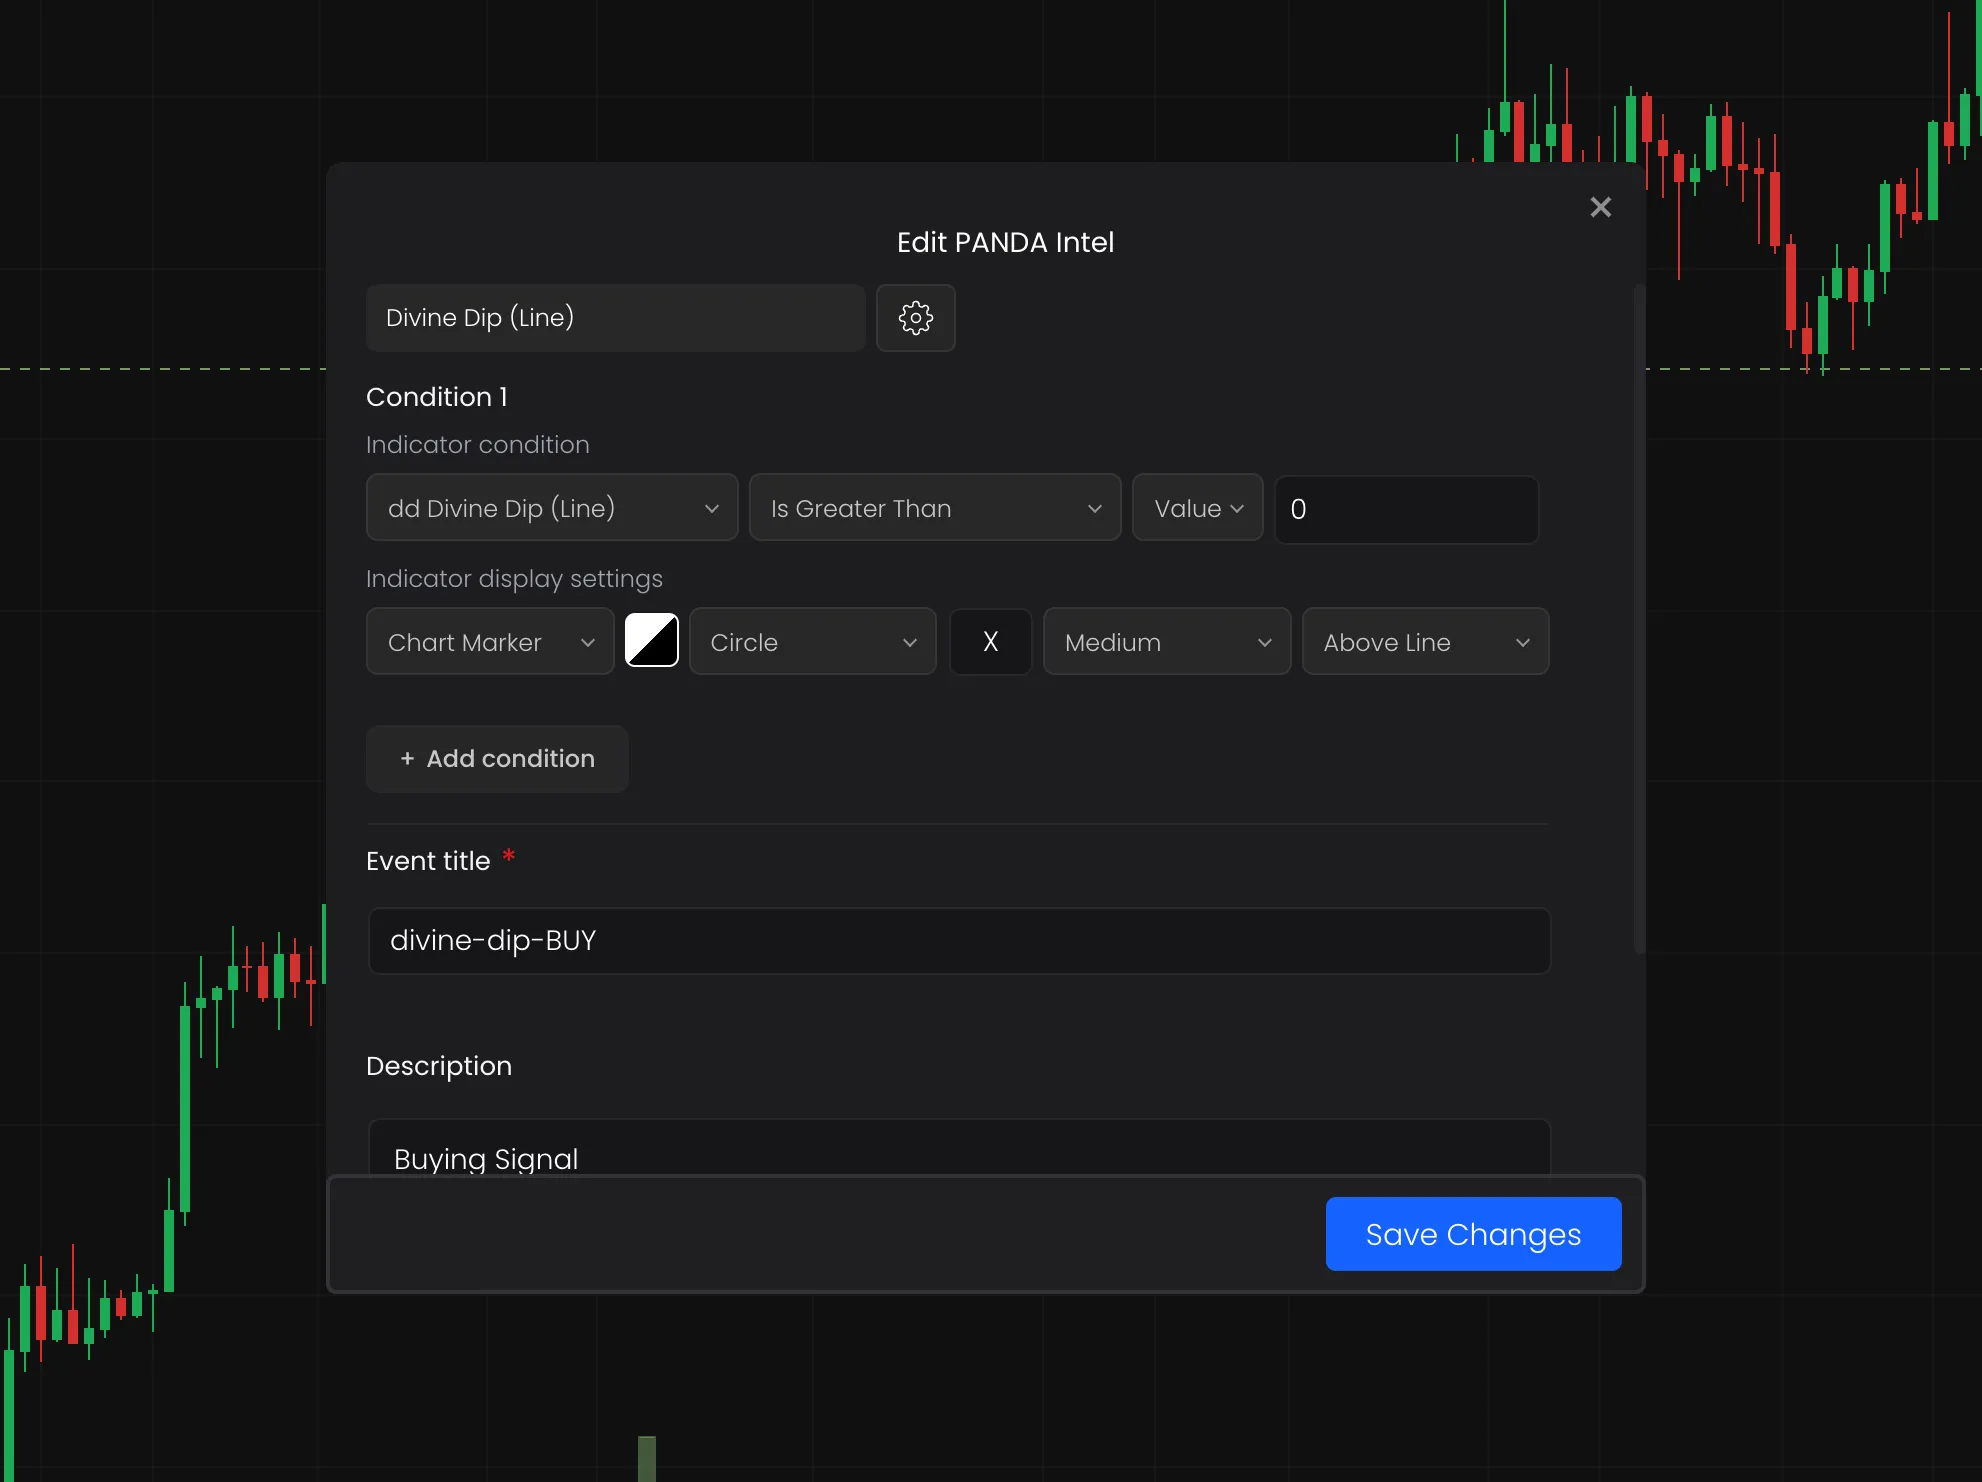
Step 1: Create Your Intel
First, you need to create an Intel. This defines the specific market conditions you want to monitor.
- Navigate to the Intel section of the platform.
- Click "Create New Intel" and select your desired conditions.
Example: Create a "Divine Dip" Intel to monitor a specific price drop. - Give your Intel a clear, descriptive name.
- Save your Intel.
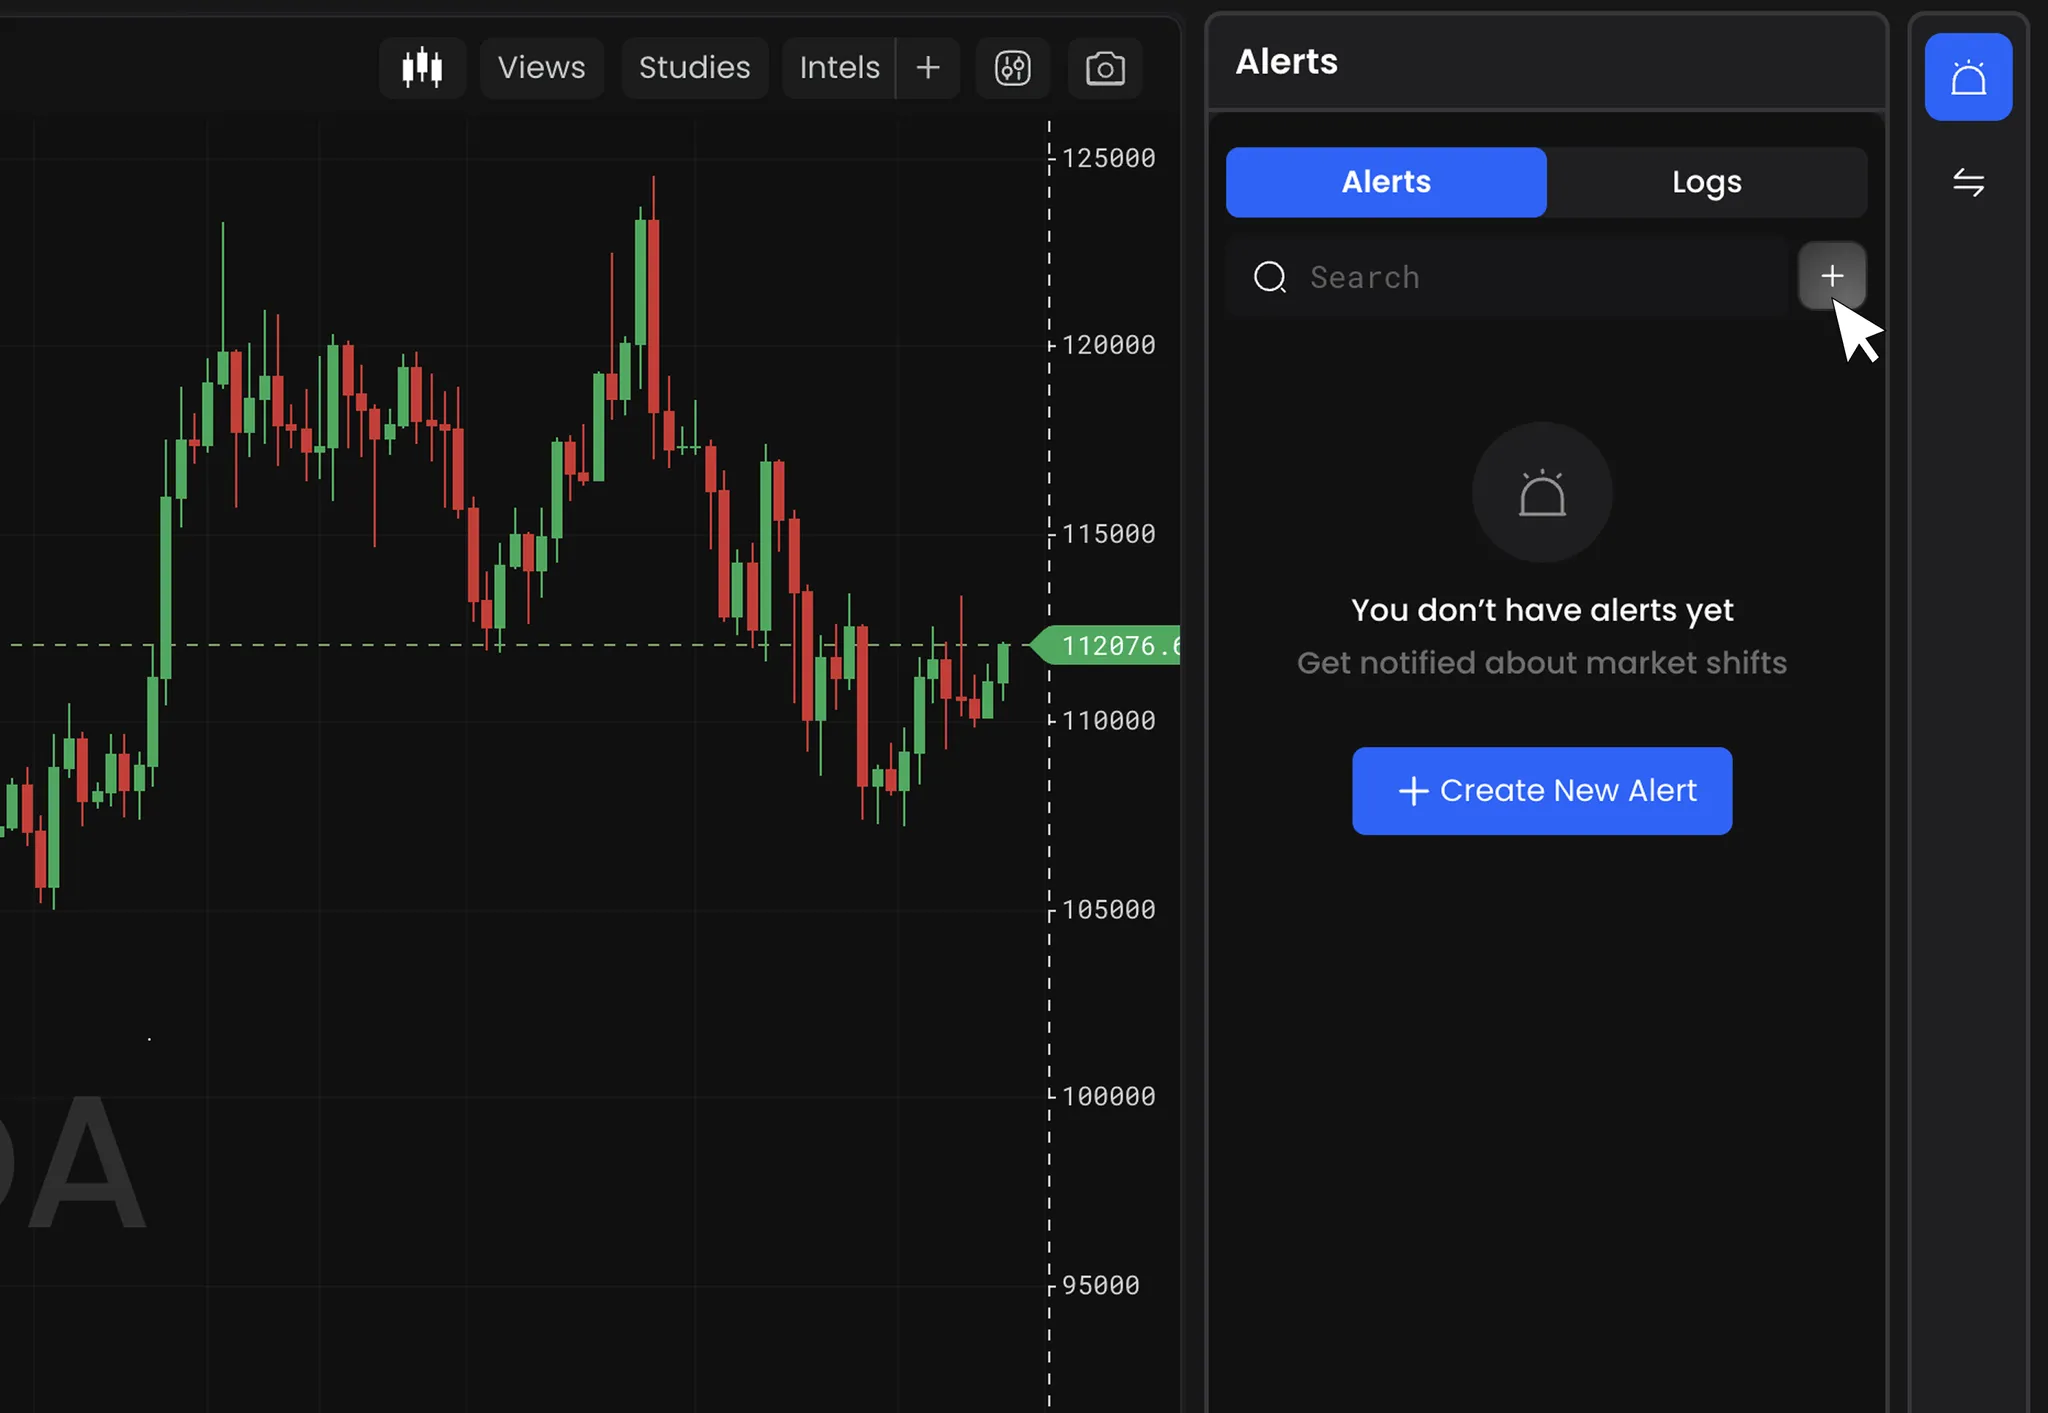
Step 2: Create an Alert on Your Intel
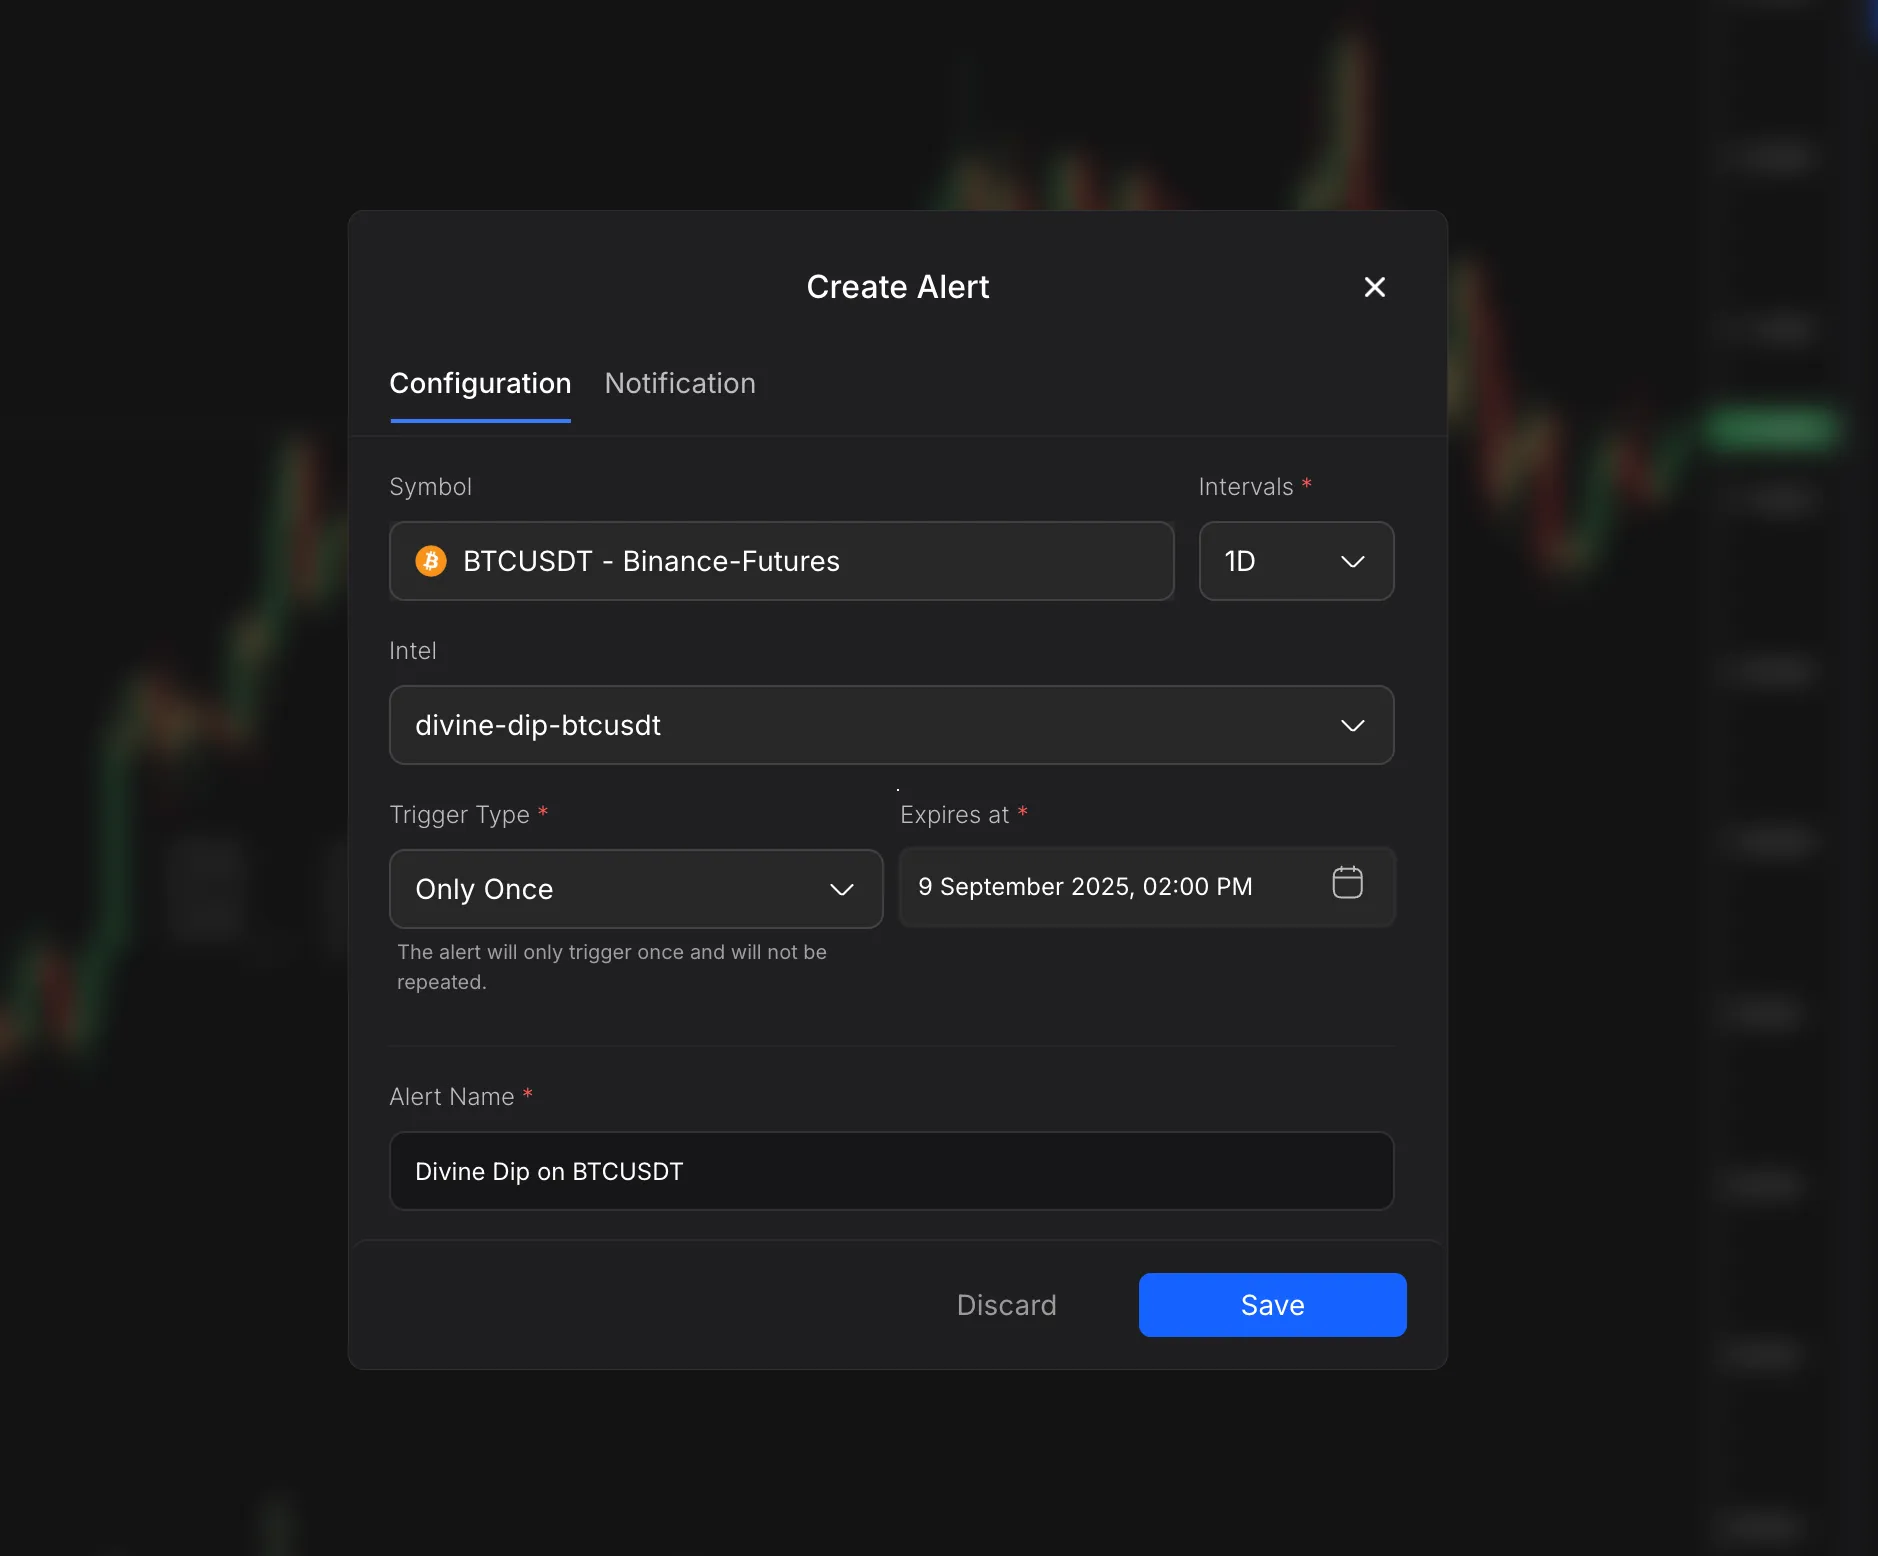
Once your Intel is ready, you can create the alert itself.
-
Go to the Alerts panel.
-
Click the '+' button to create a new alert.
-
Choose your Intel: Select the Intel you just created to link your alert to the defined conditions.
-
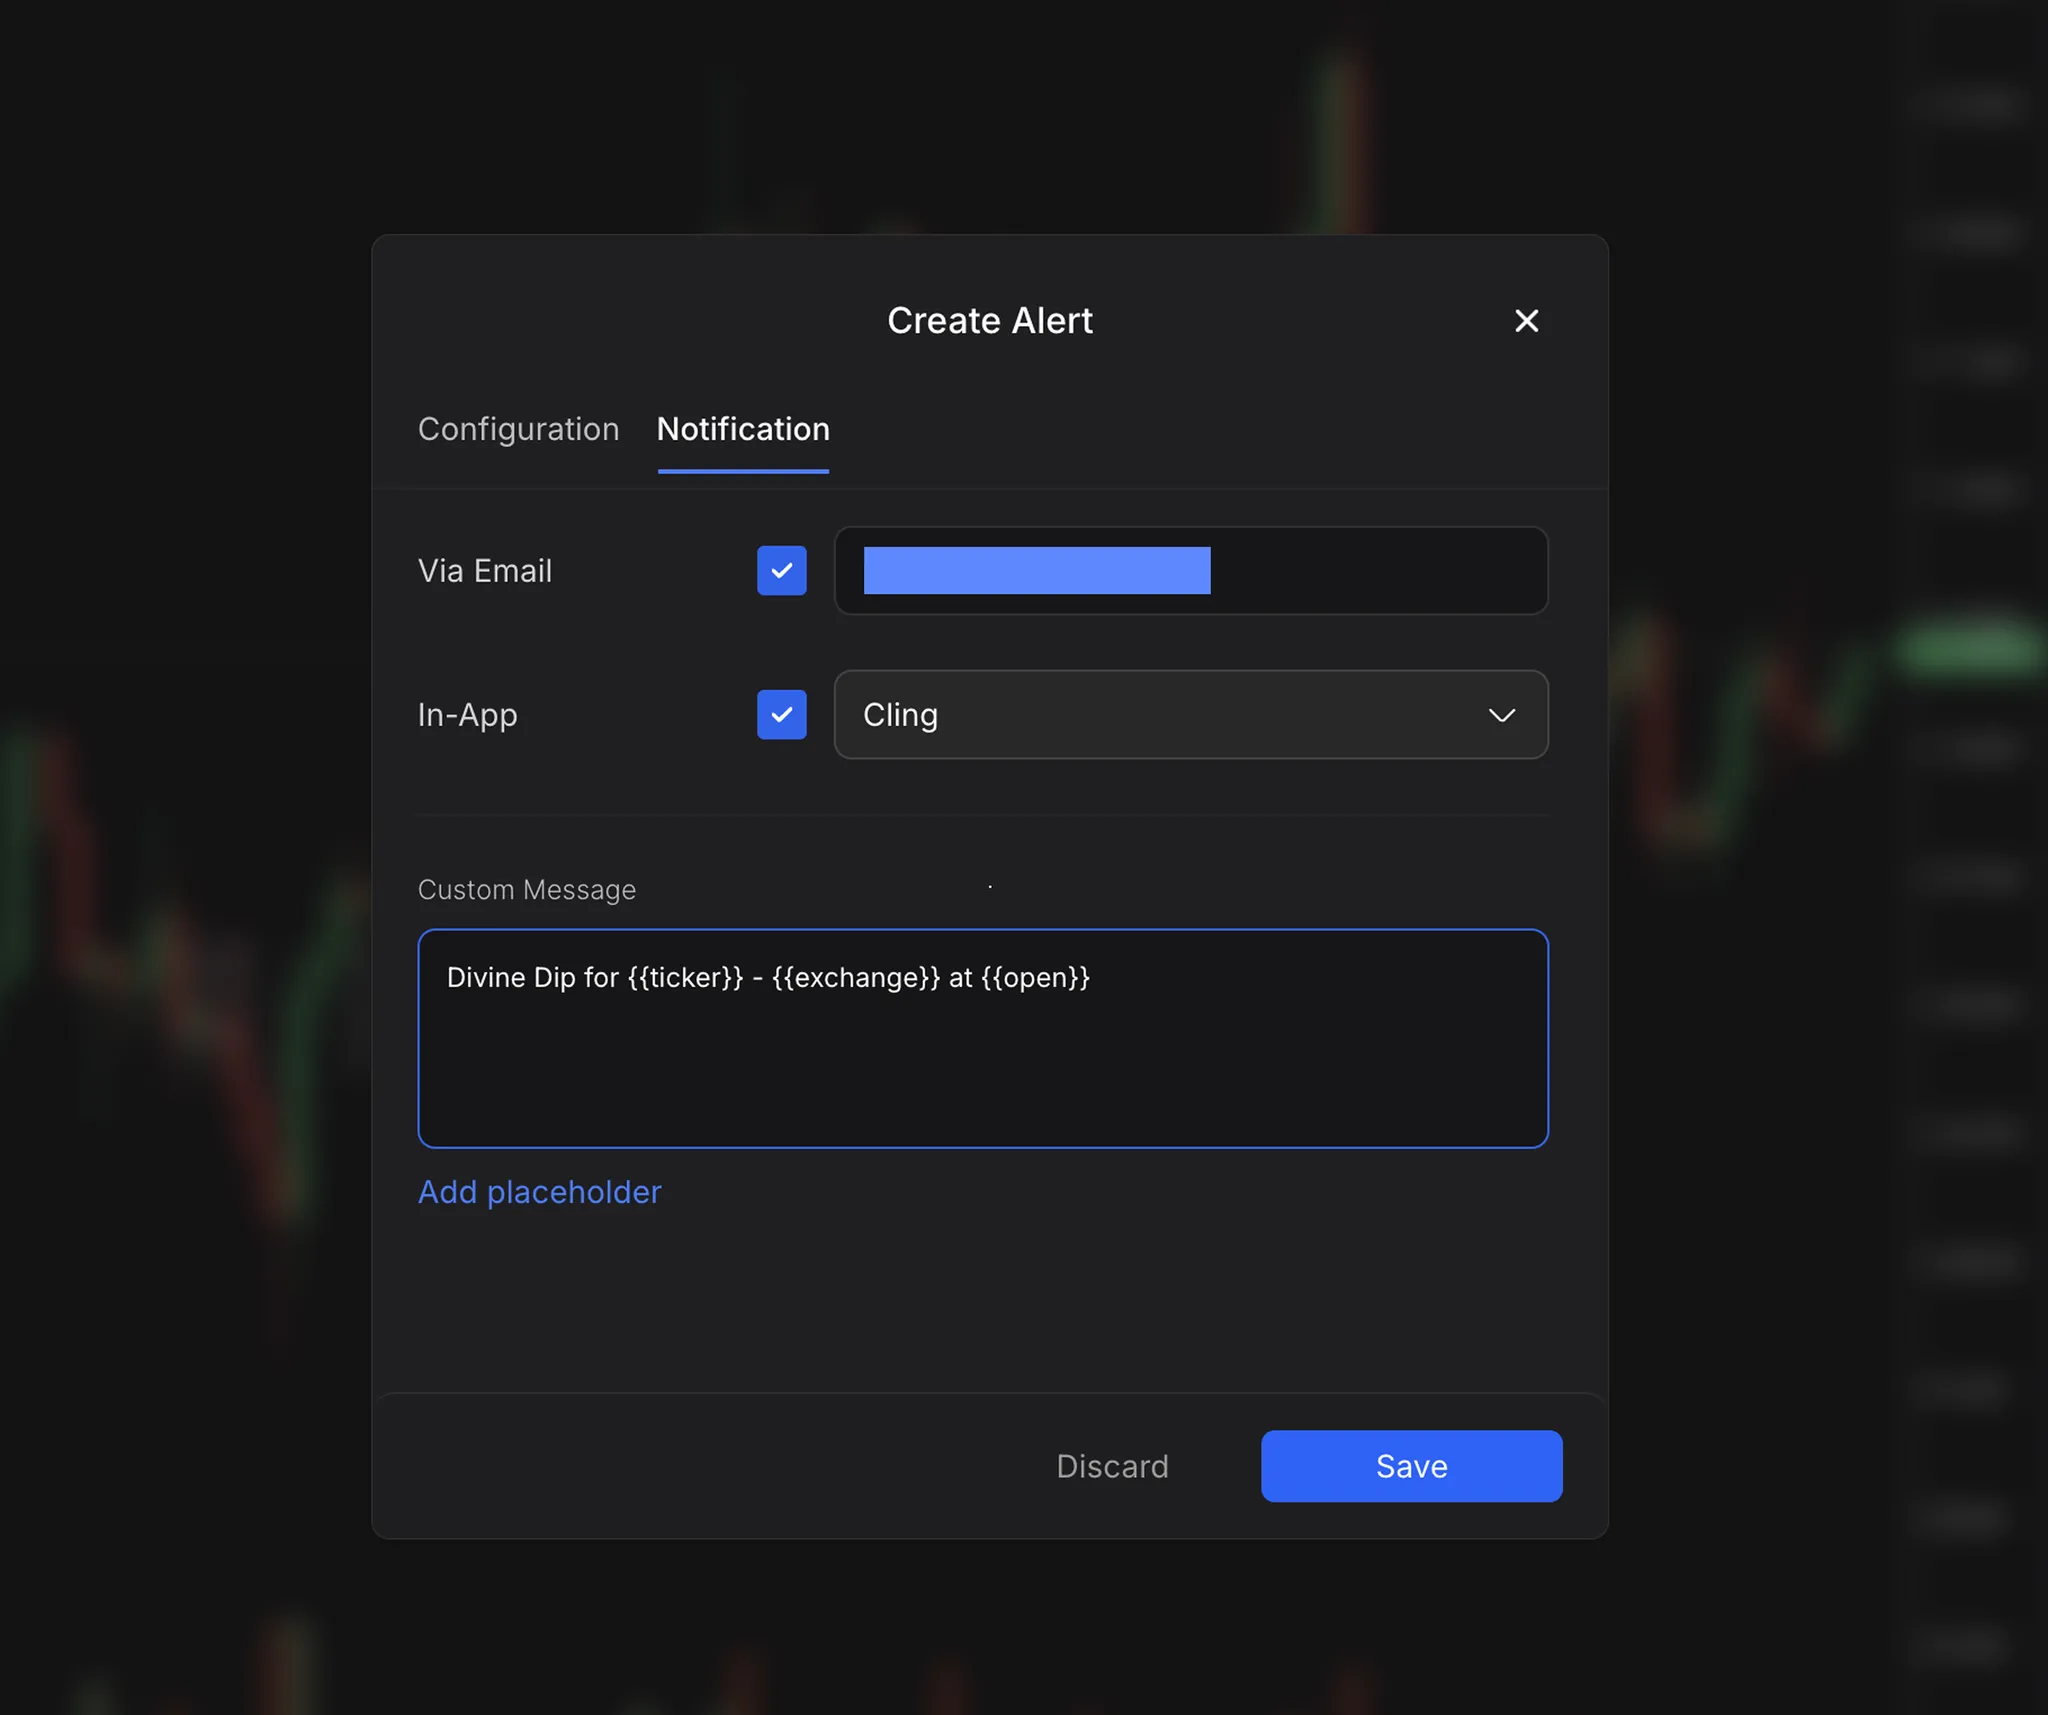
Set Notification Settings: Choose how you want to be notified.
- In-App Notifications
- Webhook Notifications
- Telegram Notifications
-
Add a Custom Message (Optional): Personalize your alert messages using placeholders to include specific details about the trigger. Placeholders help you get detailed information directly in your notification.
Placeholders
{{name}}— The name of your alert{{ticker}}— The ticker symbol of the market{{exchange}}— The exchange of the ticker symbol{{open}},{{high}},{{low}},{{close}},{{volume}}— Current OHLCV values when the alert triggers
Example Message
Using placeholders, a notification might look like:
"Spot Double Overlay Bands BTCUSDT - Bybit Spot 59000 LONG Check!"